Using a rowing machine looks fun and empowering. Imagine yourself now, all sweaty and strong after your workout, your muscles already glowing beneath your sexy tank-top and shorts.
Although they boast many benefits, rowers aren’t smooth sailing from the get-go.
Many beginners keep wrong postures and row incorrectly. That makes them more prone to injuries and prevents them from exercising effectively.
Want to avoid that with your rowing machine? We’ll discuss how to use it properly below.
Bonus: We’ll also discuss different types of beginners and which rower each type needs. Say tuned until the end!
Table of Contents
The Terms
Before watching the video on how to use a rowing machine for beginners, you’ll have to get acquainted with the terms that define your rower’s parts.
Let’s break them down below:
The Rower’s Parts
Your rowing machine has the following mechanisms and parts:
- Footplates: It’s where your feet go during your workout. Don’t keep the strap too loosely in front of your feet, or you can slip up. Besides, your strokes will feel anaemic – meaning you won’t develop as much muscle strength in the long term.
- Handle: This makeshift oar of your rowing machine is where you’ll keep your hands. Just remember, you’ll have to maintain them at a shoulder-width distance for the best posture.
- Rail: That’s the rower’s beam, on which you’re sliding back and forth during your workout.
- Display monitor: You already know this one; it’s the rowing machine’s screen where you can read all your stats (stroke rate, time, calories, etc.).
- Damper: This lever manages airflow. If you select a higher setting where more air gets in your rowing machine, you’ll need more force to activate the flywheel. Conversely, a lower setting allows you to work less hard.
How to Row Properly
Your movement on the rowing machine can be classed into these four parts:
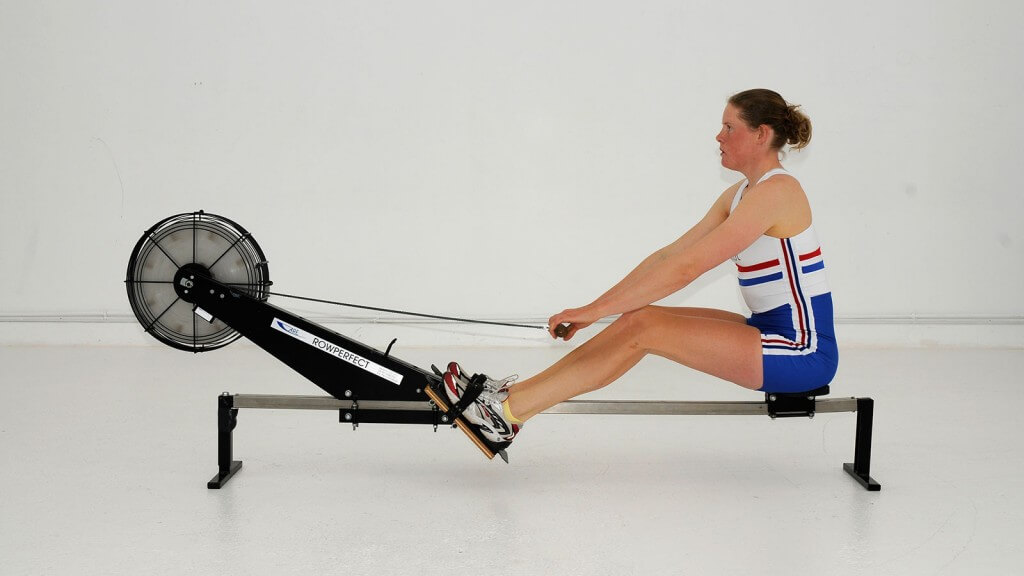
The Catch
This part represents the start of your stroke:
- You will begin with bent knees, keeping your shins at about a 90-degree angle.
- Lean forward to make an about 30-degree angle with your torso.
- Make sure your arms are straight.
The Drive
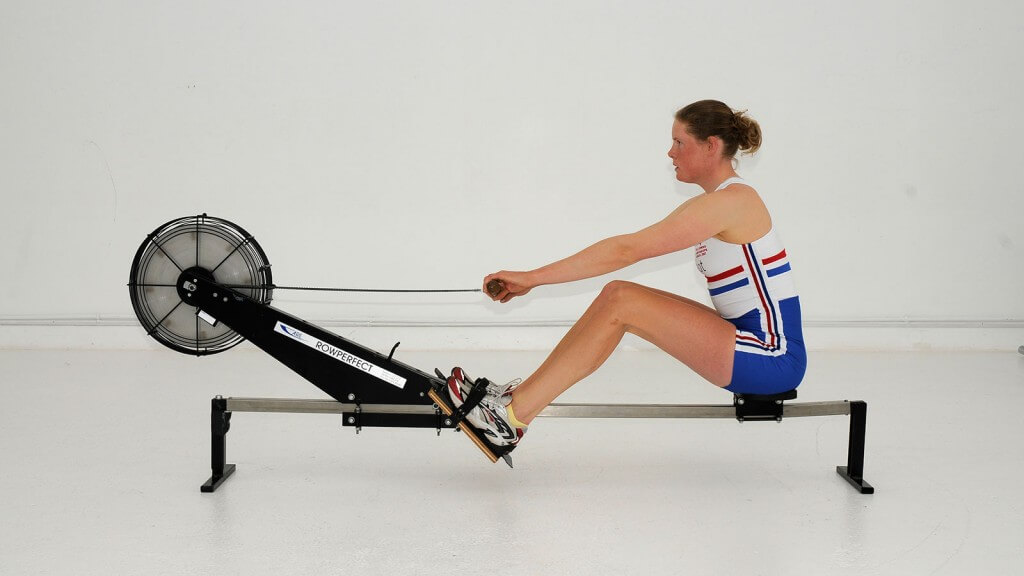
During the Drive, you gather your force to drive the rower. Here’s how you do it:
- Push with your legs.
- Lean back with your body.
- Pull with your arms.
That’s the standard, correct order of the movements you’re doing during the Drive. However, you shouldn’t stop and reassess after each one.
Your Drive should be smooth, blending all these movements into one.
It’s not as easy as it would first seem. Here are some of the most common mistakes beginners make:
- Using the arms first. It’s easier and more intuitive to use your arms first, but that decreases the overall power you’re putting in each stroke. So, don’t try to push when the handle still hasn’t passed your knees.
- Leaning on the leg-pushing motion. This mistake strains your back. Instead, you should keep your lower back tight and then lean forward.
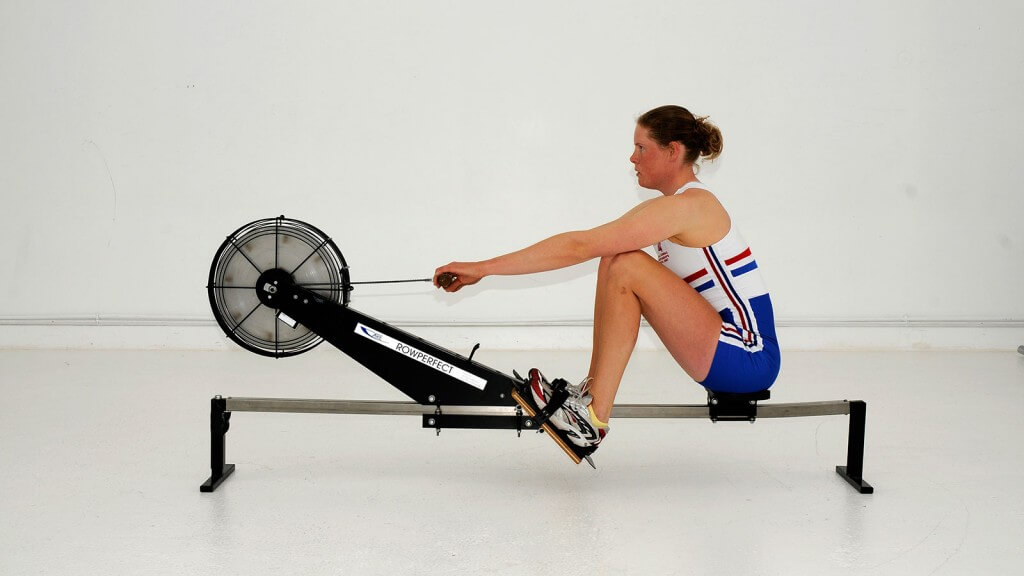
The Finish

This position is where you end up after the Drive. Here’s what a correct Finish looks like:
- Your legs are straight in front.
- Your body has a slight lean back.
- Your rower’s handle is in front of your chest.
- Your shoulders are down.
- You’re not bending at the wrists.
But, of course, you’re a beginner. You’re bound to make some mistakes during this part of the exercise. Here are the most frequent ones:
- Your shoulders are tensed. Squeezing your shoulders to your ears is an automatic movement, along with slightly opening your elbows and bending your wrists. You’re doing this because you need more force to pull on the handle, and you’re not used to getting that force from your biceps, triceps, and core. So, if you catch yourself in this chicken-like position, correct it ASAP.
- The handle is high. The rower’s handle should be in front of your chest, near the solar plexus, but most beginners squeeze it to their neck areas or even the chins. However, that movement strains your shoulders and wrists too much. Remember that you want your chest and upper back to do a lot of the work here.
- You’re tilting back too much. The finish only requires a slight tilt back that keeps your core tense. If you’re leaning a lot backwards, your lumbar area will be under too much pressure. Again, leaning backwards is your body’s automatic way of tackling that extra force and avoiding effort. However, you’ll have to educate your impulses and maintain a correct posture if you want to build your muscles safely.
The Recovery
The Recovery means getting back to the original position, basically reversing the order of the movements you did during the Drive.
So, you’ll have to:
- Straighten your arms.
- Tilt-back with your body a bit forward.
- Bend your legs.

Sounds easy, right?
Obviously, it’s not – otherwise, we wouldn’t be writing about it. Beginners’ most common mistake during Recovery is bending their legs too quickly.
This is a mistake because you’re hurrying your movement.
Thus, you’re putting too much strain on your knees and back instead of working out the major muscle groups.
Best Rowing Workouts for Beginners
If you just bought a rower and didn’t know how to use it effectively, here’s what to try:
HIIT
Interval training, aka HIIT, implies alternating between intense and medium effort periods. That way, you’re accelerating fat burn, avoiding weight loss plateaus, and increasing your metabolic rate.
Here’s how to do it:
- Warm up for 5-10 minutes.
- Row as hard as you can for 1-2 minutes.
- Row moderately for 30 seconds to a minute.
- Repeat for 15 minutes.
- Cool-down.
If you’re a glutton for punishment, try a pyramid HIIT workout that starts with a minute of high intensity, followed by low power. Next, you do two minutes of each and then three.
That’s the tip of the pyramid.
Next, you’re going to decrease the duration by reversing the periods. So, you’re going to do two minutes of high-intensity and two minutes of low-intensity, followed by one minute of each.
Don’t forget to cool down!!
Circuit Training
Using your rower as part of circuit training is an excellent idea to combine strength and cardio. So, you can:
- Row for 10 minutes.
- Do upper body strength for 10 minutes.
- Row for another 10 minutes.
- Finish with lower body strength for another ten minutes.
Steady-State Rowing
Steady-state rowing means rowing at the same speed and resistance for your entire workout. So, do a quick warm-up, find a rate that you’re comfortable with and row for as long as you can/have the time.
Usually, steady-state rowing implies an intensity that’s about 50-70% of the maximum effort you can do.
This workout is best for when you’re not in the mood for anything. You can play a favourite show in the background and get your workout done.
In Conclusion
You should always use a rowing machine correctly to prevent accidents. So, you should get familiar with each of the four motions above separately. Try to execute slow-motion strokes before your actual workout until you get the hang of your machine.
Keep your head in the game, and don’t let yourself zone out until you know how to stroke properly.
Also, remember that many people row incorrectly because their rowers don’t fit their body shapes. You should constantly adjust the rowing machine’s seat, footplates, and handle to your height.
That’s why it helps if you choose an ergonomic, easily-adjustable rower from the get-go. And remember that each rowing machine is designed for a specific purpose.
For example, some beginners want to progress quickly, so they need scalable rowers with high resistances. Other beginners want to de-stress with a semi-challenging workout twice per week.
So, get the right rowing machine for you – starting with this article.
She had to trade the gym for home fitness equipment when her two little angels were born. But she successfully managed to make the transition, and sharing her vast fitness experience online is the engine that keeps this website going.
- At What Incline Should You Walk on a Treadmill? - August 29, 2022
- 7 Best Budget Exercise Bikes (under £200) - April 5, 2022
- 6 Best Compact Treadmills for Small Spaces - April 5, 2022